Yoga, a practice celebrated for its physical and mental benefits, often presents challenges for those with limited flexibility or seeking deeper stretches. The seemingly simple act of touching your toes can become a frustrating barrier, hindering progress and potentially leading to injury if forced. But what if you could unlock a world of deeper stretches and enhanced relaxation without compromising your body's limitations? Introducing the humble yet powerful yoga block – a tool that can transform your practice and unlock previously inaccessible poses. A yoga block acts as an extension of your body, providing support and allowing you to safely explore a wider range of motion.
This supportive prop allows you to find greater depth in your stretches, fostering a deeper connection with your body and promoting a more calming and restorative yoga experience. Forget straining and pushing yourself beyond your limits; instead, learn how to use yoga blocks to modify and deepen your practice. Ready to embark on a journey of enhanced flexibility and relaxation? Let's delve into a step-by-step guide on utilizing yoga blocks for a more fulfilling and accessible yoga practice.
Safety Guidelines
- Listen to your body. Never push yourself beyond a comfortable range of motion. Stop if you feel any sharp pain.
- Use blocks only as support; don’t rely on them for excessive leverage. Maintain proper alignment and engage your core muscles.
- If you have any pre-existing injuries or conditions, consult your doctor or physical therapist before starting a new yoga routine, especially one involving props like blocks.
Methods: Supported Forward Fold
Tools Needed
Step-by-Step Instructions
Starting Position
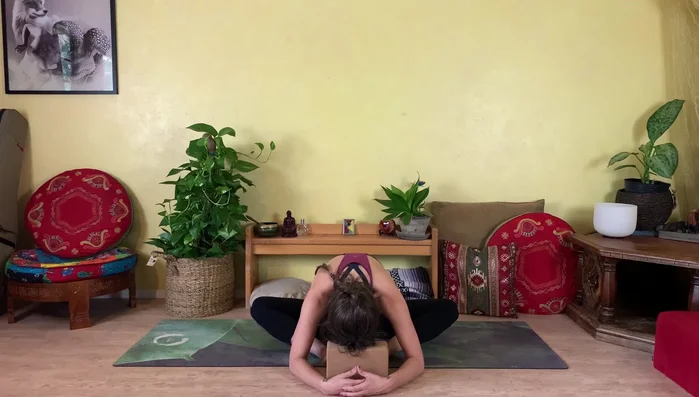
- Start in a comfortable seated position with soles of your feet together and knees wide. Place a yoga block on the floor in front of your toes.
Forward Fold
- Inhale, lift up through the crown of your head. Exhale and gently lean forward, resting your forehead on the block (adjust block height as needed).
Coming Up
- Take a full breath and relax, then slowly roll yourself up.
Tips
- If your forehead doesn't reach the block, stack blocks or turn the block to a higher setting.
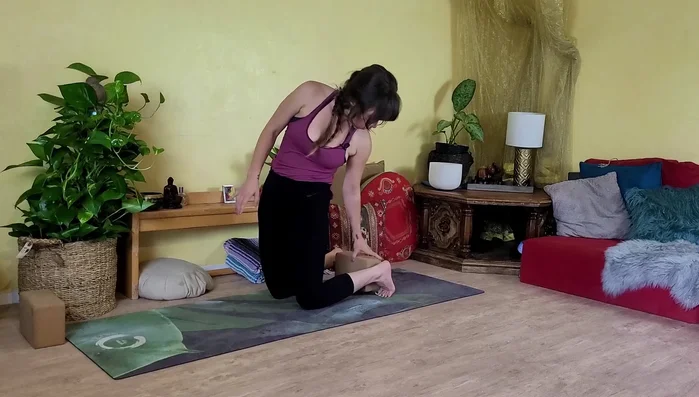
Methods: Supported Wide-Legged Forward Fold
Tools Needed
Step-by-Step Instructions
Setup
- Place a block between your feet (narrow side).
Forward Fold
- Bring another block in front of you. Inhale, lift up, exhale and fold forward, resting your forehead on the block (adjust height as needed).
Recovery
- Take deep breaths, then slowly rise.

Recovery
Tips
- Slide your feet further out for more space.
- Use blocks to support your forehead; adjust height as needed.
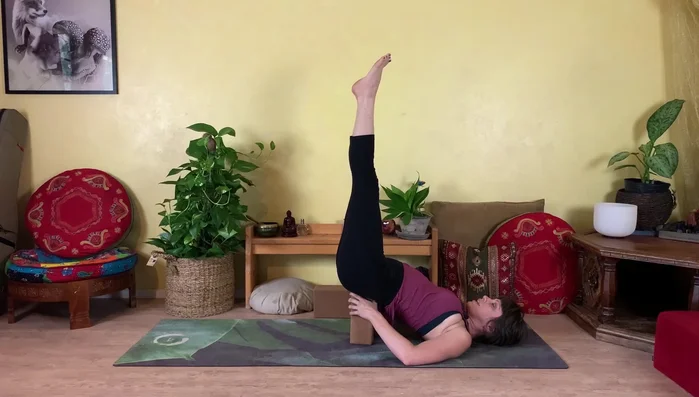
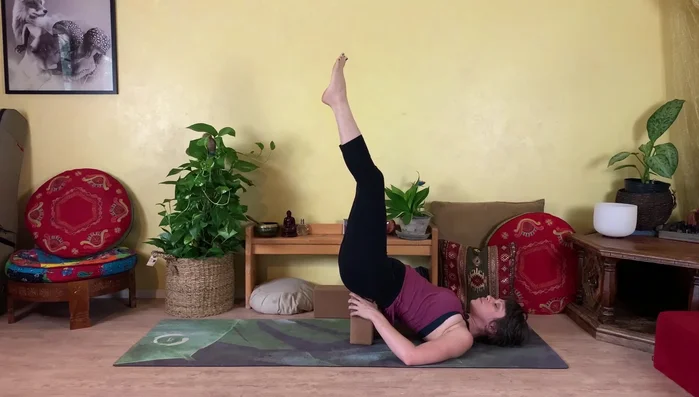
Methods: Supported Bridge Pose
Tools Needed
Step-by-Step Instructions
Setting Up Supported Bridge Pose
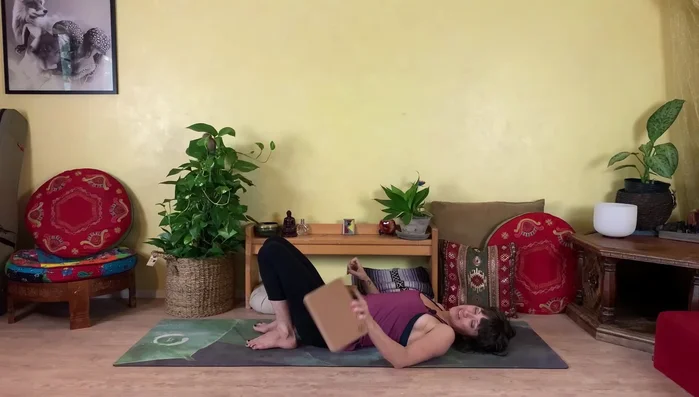
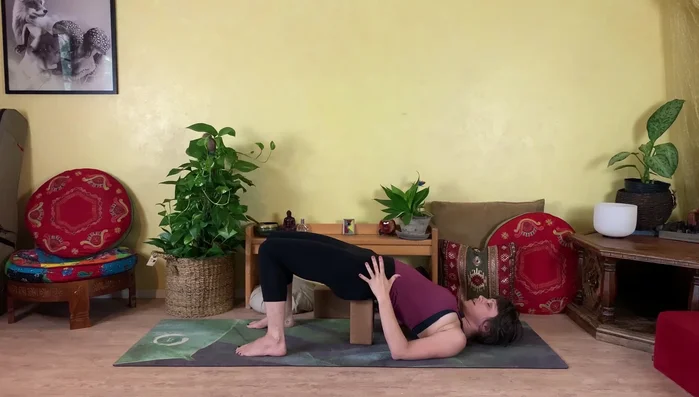
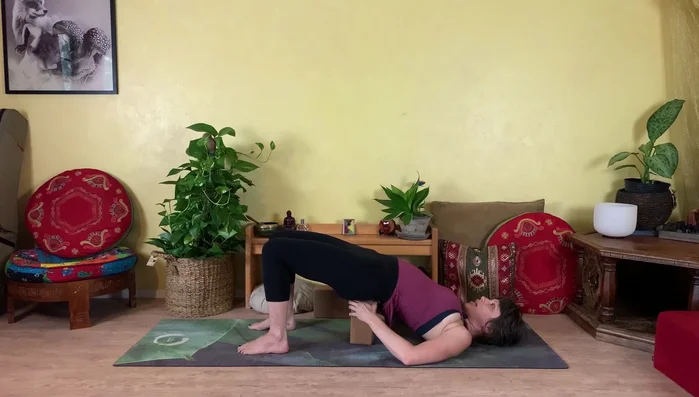
- Lie on your back, feet close to your hips. Press your hips up, placing a block underneath your hips at the desired height.
Setting Up Supported Bridge Pose Deepening the Pose
- Feel the weight of your pelvis anchoring down. You can extend one leg or both legs for a deeper stretch.
Deepening the Pose Releasing the Pose
- Slowly draw knees back in and lower hips.
Releasing the Pose
Tips
- Experiment with different block heights to find what feels best for you.
Methods: Supported Legs-Up-the-Wall Pose
Tools Needed
Step-by-Step Instructions
Preparation
- Place a block between your ankles, behind you. Sit your hips down onto the block.
Preparation Entering the Pose
- Extend your legs up toward the sky, supported by the block under your hips. This pose improves circulation.
Entering the Pose Exiting the Pose
- Slowly draw your knees back in and lower feet to the floor.
Exiting the Pose
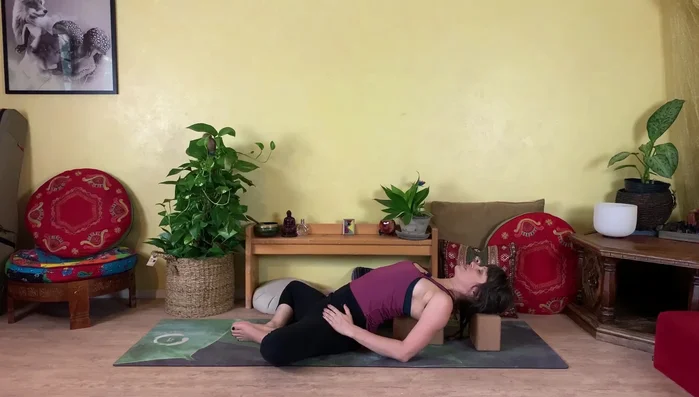
Methods: Supported Heart Opener
Tools Needed
Step-by-Step Instructions
Setup
- Place two blocks in a T-shape behind you. Lie back, placing one block between your shoulder blades and another behind your head.
Adjust Pose
- Adjust your position as needed. Let your knees fall to the center, open to the sides, or extend your legs straight.
- Relax your arms by your sides, open them to the sides, or bend your elbows and place hands overhead for a deeper stretch.
Adjust Pose Exit Pose
- Slowly roll to the side, remove blocks, and roll onto your back. Then roll to your side and sit up.
Exit Pose

Read more: Build Strength in Yoga Poses with Cork Blocks: 3 Effective Exercises