Yoga, a practice known for its flexibility and balance benefits, can also be a powerful tool for building strength. Often overlooked, the humble cork block can significantly enhance your yoga practice, providing support and allowing you to deepen your poses safely and effectively. Many find that incorporating blocks helps them access muscle groups they might otherwise struggle to engage, leading to a more robust and rewarding experience. This isn't about making poses easier; it's about using props intelligently to build strength and proper alignment, thereby preventing injury and maximizing the positive effects of each asana.
This article will explore three effective yoga exercises that leverage the power of cork blocks to build strength in key muscle groups. We'll guide you through a step-by-step process for each exercise, demonstrating how to use blocks for optimal support and to challenge your body in a safe and productive manner. Get ready to discover a new dimension of strength and stability in your yoga practice!
Safety Guidelines
- Listen to your body. Stop if you feel any pain and don't push yourself beyond your limits. Modifying poses is always an option.
- Ensure the cork block is stable and placed securely on a flat surface before using it for support. Avoid using a block that is damaged or unstable.
- If you have any pre-existing injuries or conditions, consult with a doctor or physical therapist before incorporating cork blocks into your yoga practice.
Methods: Inner Thigh and Core Engagement
Tools Needed
Step-by-Step Instructions
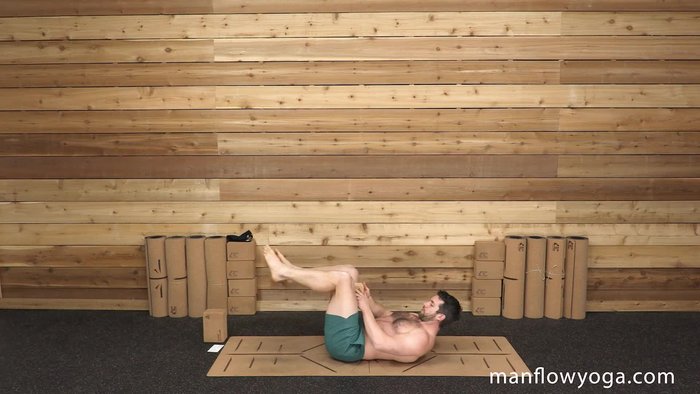
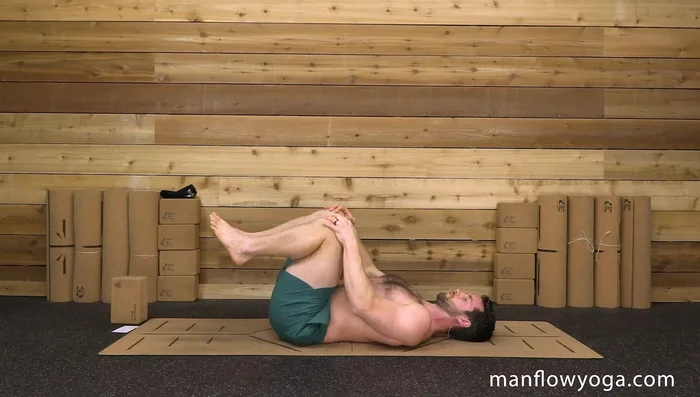
Inner Thigh Squeeze
- Place the block between your thighs and squeeze it as hard as you can.
- Keep your shins parallel and push your hands into your thighs, and your thighs back into your hands.

Inner Thigh Squeeze Hold and Engage Core
- Hold this position for 10 seconds, keeping your neck lifted but relaxed.
Hold and Engage Core


Tips
- This exercise engages your inner thighs (adductors) and core.
Methods: Supine Bicycle with Block
Tools Needed
Step-by-Step Instructions
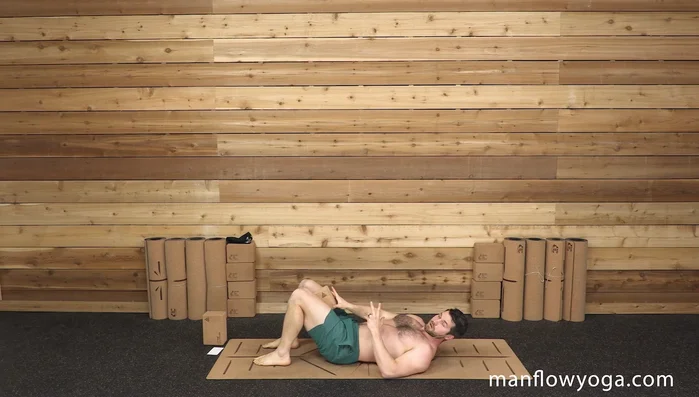
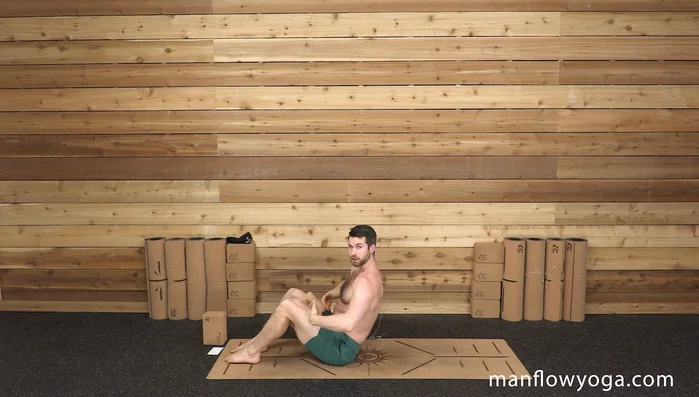
Supine Bicycle Setup
- Bring your knees over your hips and place the block on your thighs.
Supine Bicycle Setup Supine Bicycle - Right Side
- Press your right hand to the block, extend your right leg forward, and reach your left hand back. Twist and continue to push the block between your hand and thigh.
Supine Bicycle - Right Side Supine Bicycle - Left Side
- Repeat on the other side.
Increasing Difficulty
- To make it more challenging, press your hand and thigh harder together.
Increasing Difficulty


Methods: Glute Bridge with Block and Leg Extension
Tools Needed
Step-by-Step Instructions
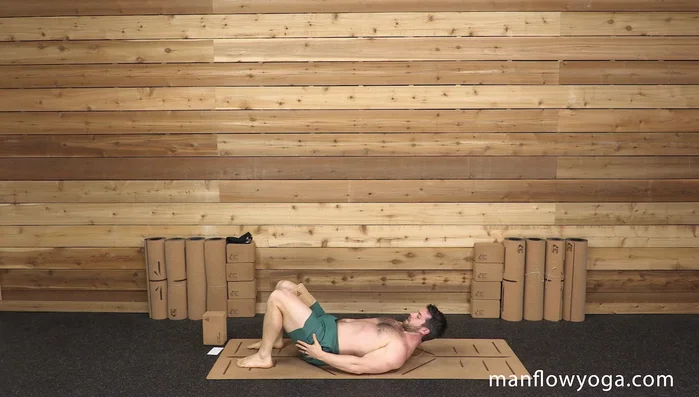
Glute Bridge Setup
- Keep the block between your thighs, squeeze your butt, press down through your feet, and lift your hips into a bridge. Keep your back flat.
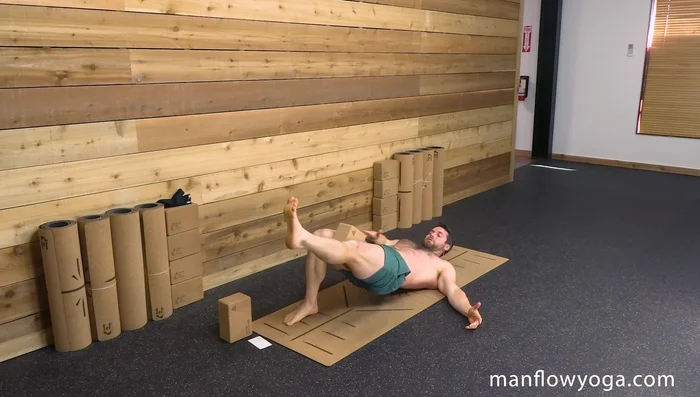
Glute Bridge Setup Single Leg Extension
- Extend one leg forward, maintaining the bridge position and squeezing the block.
Single Leg Extension Repeat on Opposite Side
- Repeat on the other side. For a greater challenge, lift your arms.
Repeat on Opposite Side

Tips
- Focus on using your hips to hold yourself up.
- Keep your hips level; don’t let one hip dip below the other.
Methods: Seated Hip Flexor Stretch with Block
Tools Needed
Step-by-Step Instructions
Seated Hip Flexor Stretch with Block
- Roll up into a seated position, keeping the block between your thighs. Plant your feet, lift your chest, and lean slightly back. Lift your shins off the floor, keeping them parallel.
Seated Hip Flexor Stretch with Block Advanced Seated Hip Flexor Stretch
- To make it more challenging, bring your arms out in front of you. Keep your back flat and engage your hip flexors and abs. You can also place the block between your ankles or feet and extend your legs upward.
Advanced Seated Hip Flexor Stretch
Tips
- Keep your back flat, don’t let your chest cave in.
- Don't rely on your low back; bend your knees if necessary.
Read more: Yoga for Inflexible People: Mastering Downward-Facing Dog & Lizard Pose with Blocks