Bring a touch of bohemian charm to your home with this easy-to-make macrame rope hanging planter! Macrame is experiencing a resurgence in popularity, and for good reason: it's a surprisingly accessible craft that yields beautiful, handcrafted results. This project requires minimal materials and tools, making it perfect for beginners or anyone looking for a quick and satisfying DIY project. Whether you're a seasoned crafter or a complete novice, you'll be amazed at how easily you can transform simple rope into a stylish and functional planter to showcase your favourite greenery.
This simple DIY project allows you to create a unique and personalized hanging planter, perfect for adding a touch of handmade warmth to your living space. From choosing the right rope to mastering the basic knots, we'll guide you through each step of the process, ensuring you achieve a beautiful and sturdy planter to proudly display your plants. Ready to get started? Let's dive into the step-by-step instructions below!
Preparation and Safety Guidelines
- 4mm camera scissors
- two rings
- measurement tape
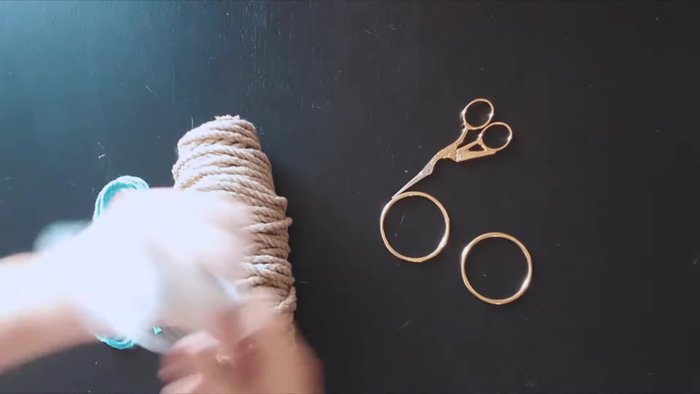
- rope (4 meters and 8 meters)
- Always use sharp scissors when cutting macrame cord to prevent fraying and ensure clean cuts. Avoid using dull scissors which can cause the cord to split.
- Securely fasten the hanging planter to its hook or support. Ensure the knotting is tight and the planter is well-balanced to prevent accidents or damage.
- If using natural fibers like cotton or jute, be mindful of water exposure. Overwatering can damage the macrame and cause it to weaken over time. Ensure proper drainage for your planter.
Step-by-Step Instructions
Prepare the Rope
- Cut two pieces of rope, each 4 meters long, and one 8-meter long rope.

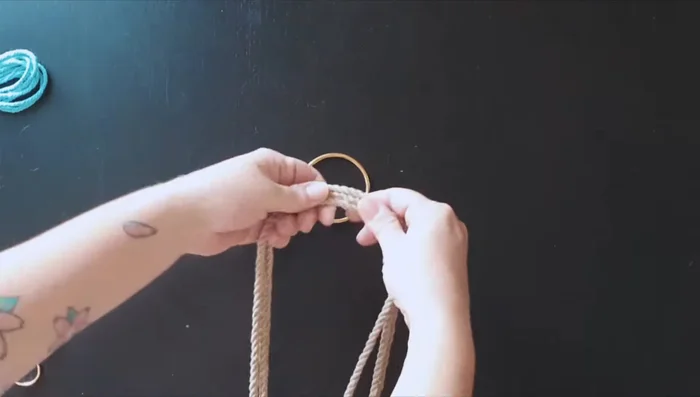
Prepare the Rope Attach the First Ring
- Fold the 8-meter rope in half and place the longer rope on the outside.
- Take a ring and place it on the ropes. Pull the rope through the ring.
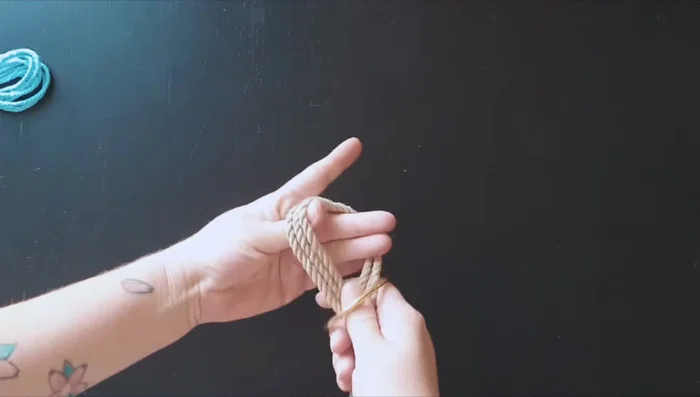
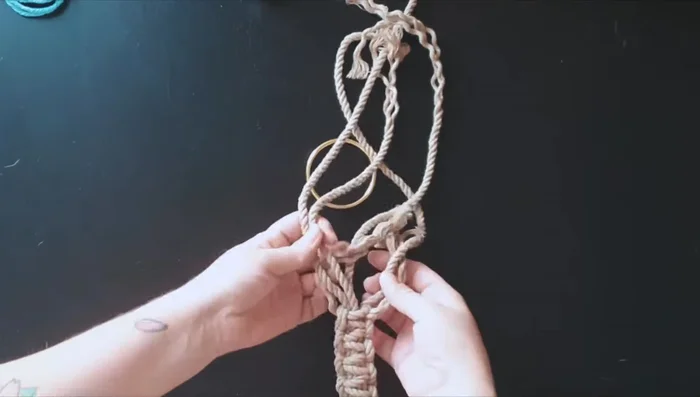
Attach the First Ring Tie Square Knots
- Tie a square knot. Take the right rope above the ropes, ensuring the left rope is above. Take the left rope, put it behind, and through the loop. Repeat this process, reversing the ropes for the second half of the square knot.
- Continue tying square knots until you are almost at the end.
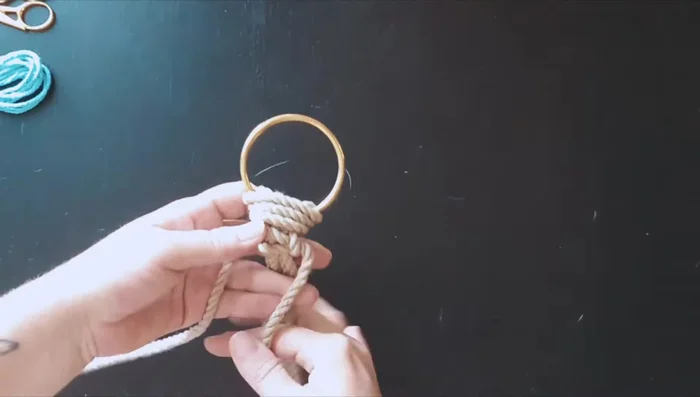
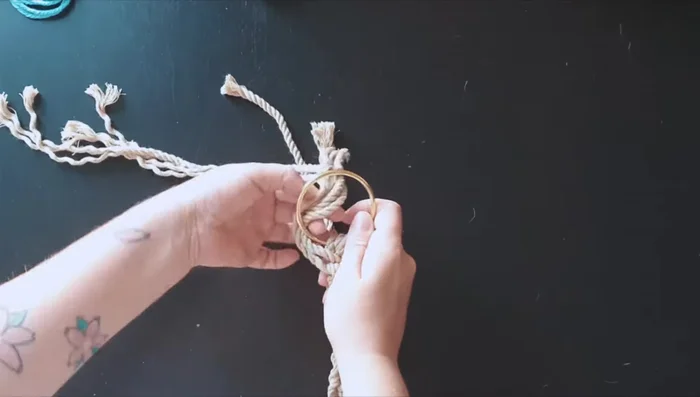
Tie Square Knots Attach the Second Ring
- Take the second ring and the three ropes from the right, pass them through the ring to the left.
- Take the left ropes and pass them through the ring and into the middle.
Attach the Second Ring Finishing Touches (Optional)
- Finish with another piece of rope (optional, for decorative purposes).
Finishing Touches (Optional)
Read more: Reclined Strap Stretches for Hamstrings and Hips: A Guided Yoga Routine
Tips
- N/A